
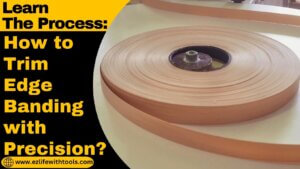
Learn the Process: How to Trim Edge Banding with Precision?
After finishing any project that has open edges and less aesthetic appeal, like tables or drawers etc.
Definitely, at this stage, you think about how to achieve those seamlessly trimmed edges on your furniture projects.
If you are one of them and think the same as others.
Then don’t worry, you are at the right place.
Trimming edge banding is an art that elevates the overall look and durability of your creations.
In this detailed article, we’ll explain the importance of edge banding, its types and the essential steps about how to trim edge banding.
Whether you’re a seasoned woodworker or a DIY enthusiast, mastering this technique can make a remarkable difference in the final aesthetics of your projects.
What is Edge Banding?
It is the process of applying a strip of material to the exposed edges of wooden panels like plywood, particleboard and MDF. It not only provides sharpness but also protects the edges from splitting, moisture, and other potential damage, which helps increase stability and gives the finished product an aesthetic look.
Importance of Proper Edge Trimming
you have already read the purpose of edge banding; now, you can’t neglect the importance of edge trimming. Because proper trimming isn’t just about removing excess material but also about the aesthetic appeal of the project.
Edge trimming ensures that the edge banding aligns with the surface to create a cohesive and visually appealing result.
Increased stability
Beyond aesthetics, accurate trimming contributes to the longevity of your project. A well-trimmed edge band not only looks good but is also perfect for everyday wear.
It acts as a protective barrier, protecting the edges from potential damage and maintaining the integrity of your work over time.
Types of Edge Banding
Edge banding materials come in different material types, and each type has its unique characteristics. Understanding the quality and types will help you choose the right one according to your choice and needs.
- PVC Edge Banding
- Wood Veneer Edge Banding
- ABS Edge Banding
- Melamine Edge Banding
- Metal Edge Banding
- Acrylic Edge Banding
1- PVC Edge Banding
This type of edge banding is used to achieve a modern and classic finish. It is available in a wide variety of colors and textures at affordable prices. It also has resistance to moisture and chemicals. Trimming PVC edge banding requires specific techniques to ensure a clean and seamless finish.
But the only drawback is that it is less flexible than other types.
2- Wood Veneer Edge Banding
If you’re looking for a natural aesthetic appearance in your project, veneer edge banding will fulfil your choice. It’s crafted from the thin slices of real wood veneer, to provide your project an authentic wooden edge that seamlessly blends with the rest of the piece.
It is environmentally friendly and can match the surface of the project.
Trimming requires careful attention to prevent splintering and achieve a smooth, wood-like finish.
But the only drawback is that it can be damaged due to moisture if not properly sealed.
3- ABS Edge Banding
The full name of this is Acrylonitrile Butadiene Styrene edge banding. It is very durable, like a heavyweight champion. This type of edge banding can be used in those areas where furniture might face a bit of rough use.
It is also available in different colors and has heat resistance qualities. But it is very expensive.
4- Melamine Edge Banding
It is a professional-looking edge banding used in furniture manufacturing due to its resistance against scratches and moisture. Trimming melamine requires precision, as the material can chip if not handled properly.
5- Metal Edge Banding:
It is an aluminum or stainless-steel edge banding available in various finishes like brushed, polished, or textured surfaces and commonly used to create sleek and stylish finishes for commercial and decorative purposes.
6- Acrylic Edge Banding:
This type of edge banding is made of acrylic polymers to provide a glossy and transparent appearance. It is available in a wide range of colors to match or contrast. It is used in luxury furniture and interior designing to achieve a sophisticated and glassy look.
How to Choose the Right Edge Banding
There are many factors to choose the right edge banding according to the requirements of your project. Consider these factors when making your selection.
Project Requirements:
Consider the function and location of your project. Is it a kitchen cabinet facing moisture and spills or a decorative shelf that’s more for show?
Aesthetic Preferences:
Think about the overall style you want to achieve. PVC for modern, wood veneer for a classic touch, or ABS for a balance of durability and aesthetics?
Budget Considerations:
While quality is essential, your budget matters, too. So, it is crucial that should be a balance between budget and quality. So, choose the perfect one according to your budget and quality, because in the market there are many ranges in prices.
Common Sizes and Thicknesses:
Sizes and thicknesses are also important factors to consider in the selection process. There are available common sizes of edge banding in the market ranging from 15mm, 18mm, and 22mm, while thicknesses can vary from 0.5mm to 3mm. So, always choose one that meets your needs.
Required Tools to Trim Edge Banding
Here is the list of essential tools required to trim edge banding. These tools help to trim easily and safely.
- Trimming router
- Edge trimmer
- Flush trim bit
- Utility knife
- Mill File
- Fine Grit Sand Paper
- Chisel
- Safety Glasses
- Ear Protection
- Mask
How to Trim Edge Banding Step-by-Step
Here, we will discuss 4 different methods to trim the edge banding step-by-step.
- Sandpaper method
- Mill File Method
- Chisel Method
- Trimming Router Method
1- Sand Paper Method
- First of all, take the piece of wood on which you have edge banding.
- Secure it well with clamps.
- Then, take fine-grit sandpaper and make it greppable with the help of a block of wood.
- Now rub the edge of the edge banding, which is extra extended from your object.
- Sand it, making an angle of about 35 to 45 degrees, but more carefully.
- Please don’t force it.
- When you see that enough rubbing has been done.
- Now, take a utility knife, place it on one edge of the edge banding and slowly rotate it along the whole wood.
- Remove the extra part of the trimmed edge banding.
- So, the edge of your edge banding is completely clean.
2- Mill File Method
- First of all, take the piece of wood or your project object on which you have edge banding.
- Secure it well with the help of clamps.
- Then, take a mill file.
- Now rub the edge of the edge banding, which is extra extended from your object.
- The angle between the wood and mill file should be about 30-45 degrees.
- Continue this process till you trim the extra edge banding.
- When you have finished.
- Clean it with the help of a soft cloth
- Congratulation! You have done it.
3- Chisel Method
- First of all, take the piece of wood on which you have edge banding.
- Secure it well with clamps.
- Then, take a chisel and place it on the starting edge of the edge banding.
- Flow the chisel towards the edge banding.
- The direction of the chisel should be towards the grain; it will help you to achieve a smooth finish.
- Use a chisel, making an angle of about 5 to 10 degrees angle, but more carefully.
- Please don’t force it.
- Remove the extra part of the trimmed edge banding.
4- Trimming Router Method
In this method, we will use a power tool to trim the edge banding. If you have a load of work, this method will work better because it is a fast and secure method.
- First of all, take the piece of wood on which you have edge banding.
- Secure it well with clamps.
- Then, take a trimming router and check it.
- Insert the flush trimming bit and adjust the depth and speed.
- Connect it to electricity, and power it ON to check that it is working properly before starting the trimming process.
- Now, place it on the starting edge of the object.
- Grind the edge of the edge banding, which is extra extended from your object.
- The angle between the wood and flush trimming bit should be about 90 degrees.
- Start trimming and continue till the end.
- After completion, Now check if some grains of trimmed edge banding remain.
- Remove them with the help of a utility knife and sand it.
- You have done it.
Conclusion
The journey from understanding edge banding materials to mastering the art of precision carving is a transformative experience for woodworking enthusiasts.
This comprehensive guide is full of the knowledge and skills you need to achieve flawless trimmed edges, increasing both the aesthetics and longevity of your projects.
As you begin your woodworking, remember care, periodic inspections, and the joy of creating pieces that not only showcase your craftsmanship but also serve as a testament to that dedication and passion.
Thank you for your time.
Best wishes