When we work to repair old furniture or wooden goods, we can face some issues. One of the problems is large or loose screw holes.
There are many reasons to fill the holes like we want a clear surface of our furniture and want to hide joints and holes of screws.
Especially if we want to reuse the wood and screw hole, it will require some technical steps.
So, don’t worry.
In this guide, I will explain the types of wood filler for big holes, the required materials and tools, and all the necessary steps to fill the screw holes to use them again for any purpose.
So, keep reading.
Why We Need to Fill Screw Holes in Wood for Reuse
There are two major reasons behind the wood holes filling.
When we tighten any screw in the hole, then behind the cap of the screw, there will remain a small empty space. Due to dirt or moisture, exposed holes or spaces behind the cap can damage the structural integrity over time. It can cause wood decay and weakening of the joint.
Suppose we want to reuse the screw hole in old furniture or wood. It will require wood filling for a secure and long life.
Using the right techniques and procedures, we can resolve future problems related to wood holes for screws.
Necessary Tools / Materials to Fill Screw Holes in Wood
Before starting the hole-filling process, it is necessary to collect the required materials and tools.
Below is the list of some necessary tools and materials.
Wood filler or putty
Putty knife / Scrapers
Wooden Dowels
Sandpaper (various grits)
Paint or stain for finishing
Clean cloth
Saw dust
Paintbrush
Wood glue
Masking tape
Screw Driver
Hammer
Preparation
Here are some necessary steps that we do before applying any filling technique.
First of all, we will remove the existing screws carefully using a screwdriver before applying any filler.
Clean the area around the removed screw hole to analyze which technique to apply.
Choose the appropriate technique to fill the screw hole according to the hole size.
Techniques to Fill Screw Holes in Wood for Reuse
Here is the list of 5 useful techniques to fill screw holes in wood for reuse. All the techniques work efficiently.
Using Toothpick and Glue
Using Sawdust with Glue
Using Wood Filler
Using Wooden Dowels
Using Screw Anchor
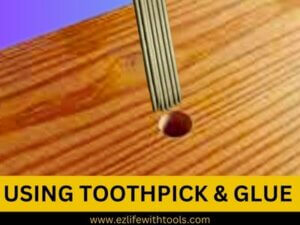
1- How to Fill Wood Holes for Screw Using Toothpick and Glue
fill screw holes in wood
It is a simple and fast method to fill screw holes in wood. But always remember, it is only for small screw holes.
First of all, we will pick 2-3 toothpicks.
Dip them into a glue jar to grab some glue.
Insert them into the hole.
Take a break to dry it completely.
Trim the excessive part of a toothpick.
Sand the surface for smooth finishing.
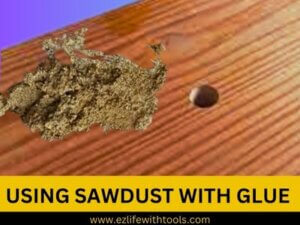
2- How to Fill Wood Holes for Screw Using Sawdust with Glue
It is a simple and straightforward technique to fill the small screw holes.
fill screw holes in wood
Here are simple steps.
First of all, we will bring fine Sawdust.
Put some sawdust on the flat wooden surface or steel container and mix well with glue.
Both ratios should be 1:1.
Fill the mixture into the hole and press with a thin stick into the hole.
It will take time to dry, approximately 40-60 minutes.
After drying, using sandpaper, smooth the surface of the wood.
Now we can reuse this place to insert the new screw.
3- How to Fill Wood Holes for Screw Using Wood Filler
Wood filler is a versatile option to fill medium-sized screw holes in wood.
Follow these steps for effective use.
Assess the Hole Size and Depth:Evaluate the size and depth of the hole because larger holes might require additional support.
Choose the Right Filler:Matching the wood filler to the type of wood is pivotal. There are various filler types available, including water-based and solvent-based options. Consistency, color, and drying time are vital factors to consider.
Prepare the Wood Surface:A clean canvas is essential. Clear the dust, debris, and old filler around the hole. A clean and smooth surface is the foundation for successful filler adherence.
Prepare the Wood Filler:Take the necessary amount of wood filler in a mixing bowl. Mix it well with a hardener. The ratio between wood filler and hardener should be 16:1. Use this mixture within 15 minutes.
Apply the Wood Filler:Using a putty knife, delicately insert the wood filler into the hole. Overfill slightly to account for drying shrinkage, then ensure an even and smooth surface.
Sanding and Smoothing:After the filler dries, deploy sandpaper to smoothen the surface. Begin with coarse grit and gradually transition to finer grits for a seamless finish.
Matching the Finish:Ensure the filler finishes match the surrounding wood for painted or stained wood. A blend of different stains or paints is sometimes necessary to achieve a near-perfect match.
Final Touches:Thoroughly inspect the filled hole to ascertain its level with the surface. Make any required adjustments before proceeding.
Allowing for Drying Time:Patience is key. Allow the filler sufficient time to dry, adhering to the manufacturer’s guidelines. It is crucial to establish a robust and enduring bond.
Re-Drill the Holes: Once the filler has dried, do not drill till 24-48 hours. After that, utilize a drill to create the new holes for the screws. These holes will guide the screws without jeopardizing the integrity of the filler.
Screw Installation: Gently insert the screws into the holes and gradually tighten them. Avoid excessive tightening, as it could damage the filler and the wood.
4- How to Fill Wood Holes for Screw Using Wooden Dowels
The small pieces of wood we use to fill the affected screw holes in other pieces of wood are called wooden dowels. We use them as a sturdy solution for larger holes.
First of all, identify the hole size we want to repair and choose a wooden dowel according to the hole’sfill screw holes in wooddiameter.
The depth of the Wood dowel should be longer than the depth of the hole.
Dip the dowel into the glue.
Insert it into the hole.
Use a hammer to drive the wood plug into the hole.
Wait for some time till the glue dries.
Trim the excess dowel using a chisel.
Sand the surface for smooth finishing.
Note: if we want to reuse the filled hole to screw, we will use a drill to make a hole in the dowel’s center.
5- How to Fill Wood Holes for Screw Using Screw Anchor
fill screw holes in wood
It is a simple and easy method to tighten the screw into the old hole. The screw anchor is a metal sleeve we insert into a drilled hole. The screw is then inserted into the anchor and tightened. The anchor prevents the screw from pulling out of the wood.
First of all, insert the screw anchor into the hole.
Tap the anchor with a hammer into the hole.
The top of the screw anchor surface level should be balanced with the wood surface level.
Then insert a screw into the anchor and tighten it.
Conclusion
In woodworking and DIY projects, the art of filling wood holes for screws is a small yet impactful detail that should not be ignored.
The careful choice of filling material, technique, and seamless finishing is the identity of a craftsman who takes pride in every aspect of their work.
If you follow the techniques and tips explained in this article, you can confidently tackle wood hole filling.
Thank you for your time.
Best Wishes
Frequently Asked Questions
Can I use regular putty instead of wood filler?
No, Regular putty is only for minor repairs, and wood filler is specifically designed for wood surfaces.
How long should I wait for the filler or glue to dry?
Wait for 24 hours minimum before the next step. Because drying time varies according to the product and environmental conditions.
Can I paint over the filled area?
Yes. Once the filled area is sanded and finished, you can paint over it to match the surrounding wood.